PHOTOSHOP TUTORIAL


To open up an new
document you start by using the tool bar and clicking on new you will be then given many options on how
you would like to set up your document you are given the pixel dpi and the
colour and size of the document you can start by choosing an international
paper which automatically sets the document to an A4 size which is easier to
print off when it comes to printing .

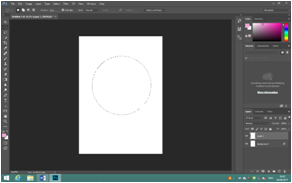 To start creating you use the tool bar that runs down the
side they give you loads of options of shapes but if you click on the eclipse
tool and press they shift key on your keyboard you will create the perfect
circle. To fill the circle with colour you simply select the paint bucket in
the tool bar on the left and then select the colour on the palette that appears
on the right top corner of the screen then use the mouse to click on your shape
and it will fill the shape with your selected colour.
To start creating you use the tool bar that runs down the
side they give you loads of options of shapes but if you click on the eclipse
tool and press they shift key on your keyboard you will create the perfect
circle. To fill the circle with colour you simply select the paint bucket in
the tool bar on the left and then select the colour on the palette that appears
on the right top corner of the screen then use the mouse to click on your shape
and it will fill the shape with your selected colour.
To create a gradient yet again you go into the tool bar and
select the gradient tool then you choose two contrasting colours and drag the
mouse inside the chosen shape to create a rendering between two colours inside
the chosen shape.

To add a stroke you simply select the shape that you have created and go onto the effect tool in the rift bottom corner below the layers and hover and press stroke it will then give you a selection are
a where you decide on the size and colour of the stroke that you wish to put in your shape


To change the opacity of your shape you simply select your shape using the magic wand tool and use the selection bars on the right side of your screen there is a lever with the opacity percentage and you can change it to whatever you wish the opacity to be . The opacity is how transparent the shape is


To warp a shape you
simply draw the shape and add the colour a gradient you please and then you use
your keyboard to press control T and right click with the mouse you then get to
select warp where lines will appear on your shape to change the position on
each aspect of your shape


To add a brush you
simply sue the toolbar running across the top of photoshop and you select brush
and you are able to create and download your on brushes you can change the
colour of brushes and you can layer them over each other to create professional
images


To have a selection of grey scale and colour on your work
you simply copy and paste the image into photoshop and you change the mode to
greyscae and then change it back to RGB mode then select the following arrows
on your right toolbar and click on the the box then presents paste it will then
give you the ability
to add colour to selected areas which is the exact colour of the original image


To get filters on the background of your image your simply colour the background of your document and then press filter on the toolbar running across the top of the photoshop and then click on filter gallery and then it gives you many opportunity’s to create different textures of the background giving the document and proffesional look
Comments
Post a Comment